Welcome to a detailed exploration of the ATR6250x stereo condenser microphone by Audio-Technica! Whether you’re a seasoned content creator, a budding podcaster, or someone who simply appreciates quality audio, this ATR6250x review is crafted with you in mind.
We’ll dive deep into the nitty-gritty of this microphone, exploring its unboxing experience, technical specifications, and performance, all while keeping it light, engaging, and jargon-free. So, let’s embark on this auditory journey together, shall we?
Related: The Best Microphones For Recording in Podcasting
Contents
ATR6250x Review: Unboxing Experience
Ah, the thrill of unboxing a new gadget! The unboxing experience is not merely about opening a box; it’s the first physical interaction you have with your new device. It sets the stage, offering a first impression that can be as memorable as the product itself. So, how does the ATR6250x fare in this regard? Let’s unwrap this together, exploring the packaging and initial design impressions that greet you upon opening the box.
Packaging Insights

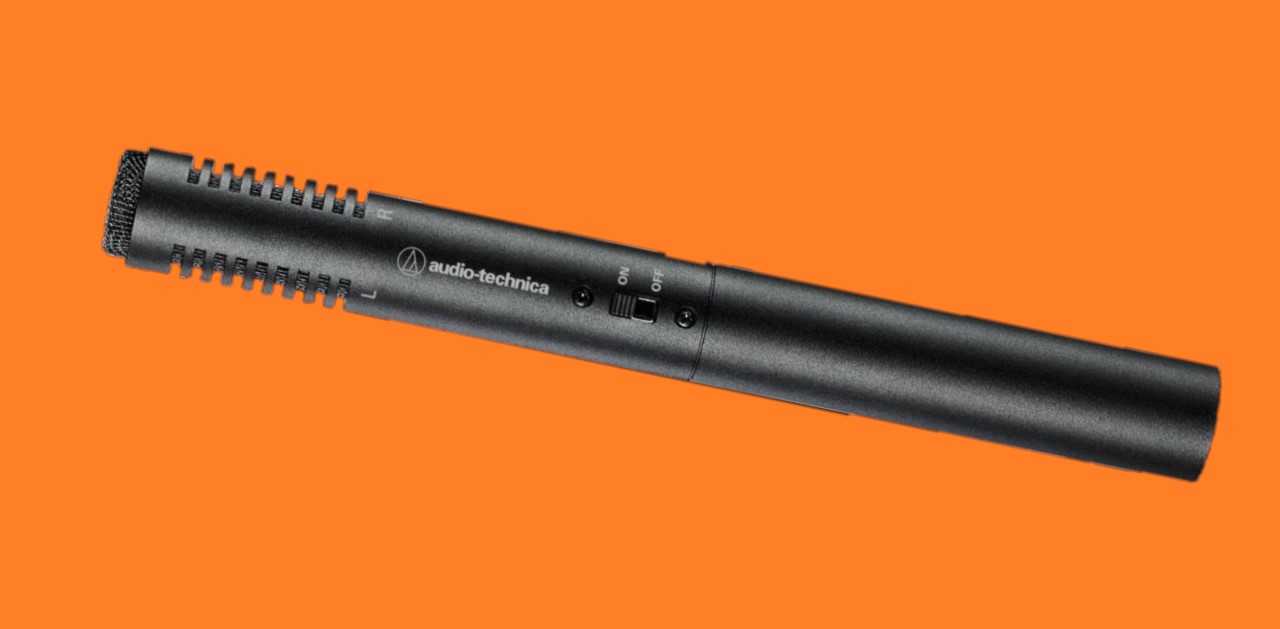
The ATR6250x has rugged construction with conveniently located on/off switch. Image Source.
The ATR6250x comes in a neatly packaged box, ensuring the safety and security of the microphone during transit. The packaging, while minimalistic, does not compromise on providing adequate protection to the device.
Upon opening, you’re greeted with a well-organized interior, where each component has its own secure spot, minimizing the risk of in-transit damage and presenting a clean, professional appearance. But what about the design and build quality that is revealed in this unboxing?
The packaging also includes a detailed manual, which not only guides you through the setup process but also provides valuable insights into getting the best out of your ATR6250x. It’s clear that Audio-Technica has invested thought into ensuring that the unboxing experience is smooth and informative, paving the way for a positive initial interaction with their product. Now, let’s examine the microphone itself.
Design And Build Quality
Upon first glance, the ATR6250x boasts a sleek, professional aesthetic with a compact design that doesn’t compromise on its robust build quality. The microphone, with its sturdy construction and the audio recorder rugged construction, promises durability while maintaining a lightweight and user-friendly appeal. But does the design translate to functionality and durability in the long run? Let’s explore further.
The attention to detail in the design is evident, with the intuitive placement of controls and connectors that promise an easy and hassle-free user experience. The build quality, while ensuring durability, also considers the practicality of usage, ensuring that the microphone is not only built to last but also to be user-friendly and efficient in its functionality. Now, with the design and build thoroughly explored, let’s move on to the setup process.
Setting Up The ATR6250x Microphone

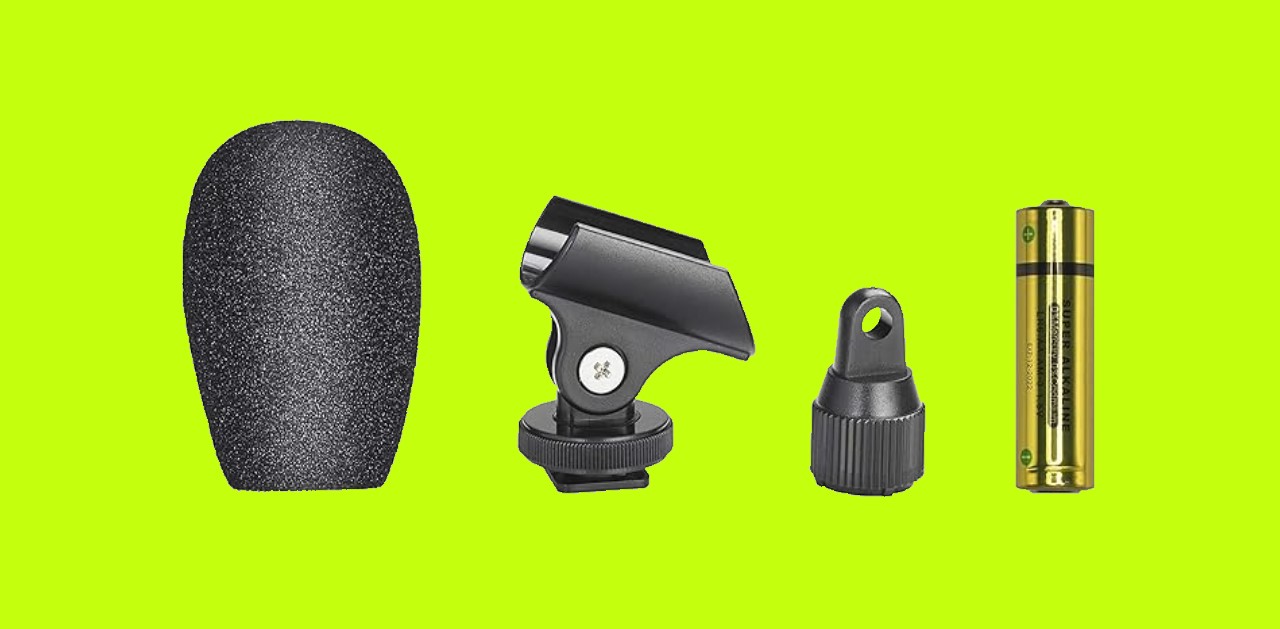
The kit includes a professional camera shoe mount, interchangeable mic-stand base, foam windscreen, and more. Image Source.
The installation process, while straightforward, warrants a detailed walkthrough to ensure that from the moment you unbox the microphone to the instant you hit ‘record’, your experience is seamless and devoid of hiccups. So, let’s delve into a step-by-step guide to ensuring your ATR6250x is set up to perfection.
Step 1: Unboxing And Inventory Check
Begin by carefully unboxing the ATR6250x and laying out all the components neatly. Ensure that the microphone, cables, adapters, and any additional accessories are present and in perfect condition. Refer to the manual to confirm that all items are accounted for, ensuring a smooth setup process without unexpected interruptions.
Step 2: Understanding Your Setup
Before diving into connecting cables, take a moment to understand your recording setup. Identify the device you’ll be connecting the ATR6250x to, whether it’s a camera, computer, or recording device, and ensure that you’re familiar with its input ports and settings. This understanding will pave the way for a smooth installation process, ensuring compatibility and optimal setup.
Step 3: Connecting The Microphone
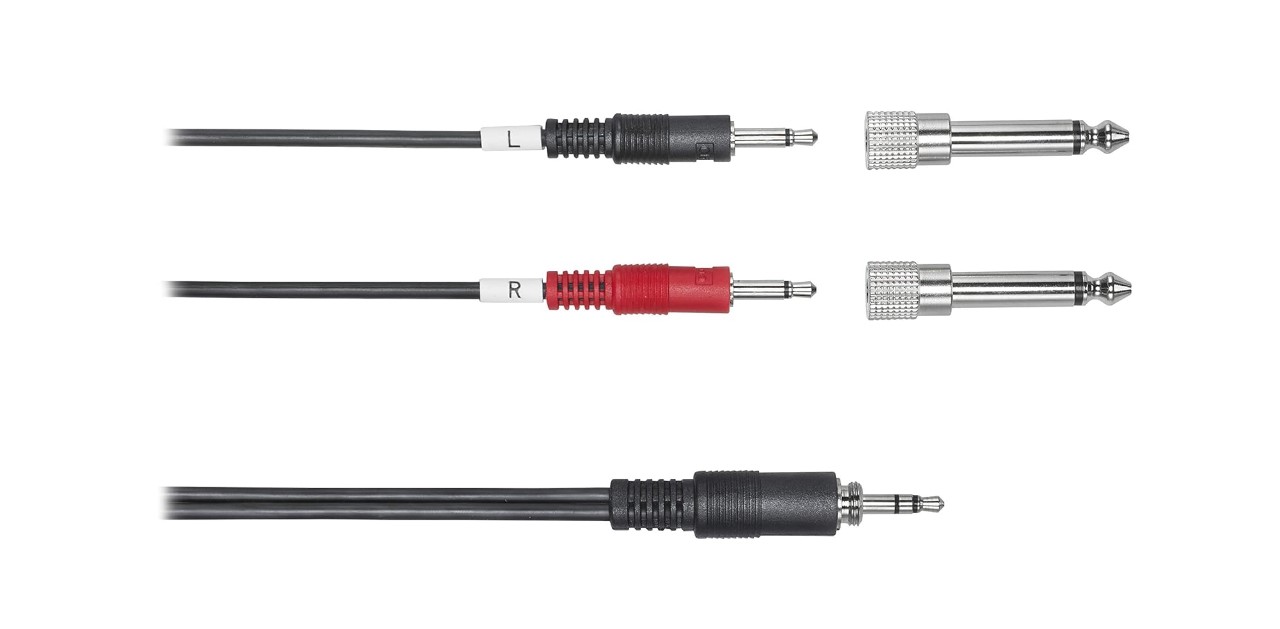
Utilizing the provided long recording cable, connect the ATR6250x to your recording device. Ensure that the connectors are securely inserted into the corresponding ports, preventing any loose connections that might impact audio quality. If you’re utilizing an adapter, ensure it’s connected securely, providing a stable link between the microphone and your device.
Step 4: Configuring The Recording Device
Once connected, navigate to the audio settings on your recording device. Ensure that the ATR6250x is selected as the primary input device and adjust the input levels to ensure optimal audio capture. Conduct a brief test recording to confirm that the audio is being captured accurately and that the levels are appropriate for your recording environment.
Step 5: Positioning The Microphone
Position the ATR6250x in a manner that ensures optimal audio capture while minimizing potential disturbances like wind or ambient noise. Utilize any provided windshields or mounts to stabilize the microphone and ensure that it’s positioned at an optimal distance from the sound source. The foam windscreen included in the package can be particularly useful in outdoor settings to minimize wind noise.
Step 6: Conducting A Test Recording
Before diving into your primary recording, conduct a test to ensure that the audio is clear, at an appropriate level, and free of distortions or disruptions. Listen back to the test recording using headphones to confirm that the audio is up to your expectations, and make any necessary adjustments to the positioning or settings if required.
Step 7: Final Adjustments And Recording
With the test recording approved, make any final adjustments to the microphone positioning or input levels and commence your primary recording. Ensure that the recording environment remains consistent to maintain audio quality, and keep an eye on the input levels during recording to ensure consistency.
Step 8: Post-Recording Check
Once your recording is complete, review the audio to ensure that it has been captured to your satisfaction. Pay attention to any potential issues like peaking, distortions, or unexpected noises, and make note of any adjustments to your ATR6250X stereo condenser that might be required for future recordings.
ATR6250x Review: Technical Specifications

The kit includes short camera cable (3. 5 mm stereo to 3. 5 mm stereo) and long recording cable (3. 5 mm stereo to dual 3. 5 mm mono). Image Source.
Navigating through the technicalities of a microphone can often feel like a daunting task, especially with the jargon and numbers thrown around. But fret not! We’re here to break down the technical specifications of the ATR6250x in a way that’s easy to digest and, dare we say, fun to explore.
Let’s dive into the world of frequency responses, sensitivity, and more, ensuring you’re well-equipped with the knowledge to make an informed decision.
Frequency Response
The frequency response of a microphone plays a pivotal role in determining how your recordings will sound. The ATR6250x boasts a frequency response that is tailored for clear, detailed audio across a wide range. But what does this mean for you as a user? Let’s delve into the intricacies of frequency response and explore how it impacts your recording experience.
Understanding frequency response can be the key to achieving the desired sound quality in your recordings. The ATR6250x, with its wide frequency response, ensures that whether you’re recording a podcast, an interview, or any other audio, the sound is captured in a detailed and authentic manner. But how does the microphone fare in terms of sensitivity? Let’s explore further.
Sensitivity
Sensitivity in a microphone refers to how effectively it can convert acoustic pressure into an electric voltage. In simpler terms, it’s about how well the microphone can pick up quiet sounds. The ATR6250x, with its high sensitivity, promises to capture even the subtlest of sounds, ensuring that your recordings are rich and detailed. But how does this translate into real-world usage?
A microphone with high sensitivity, like the Audio Technica ATR6250x, ensures that even the quietest whispers and subtlest nuances in sound are captured with clarity. This means whether you’re recording in a controlled studio environment or out in the field, the microphone is adept at picking up the intended sounds while maintaining a clean and clear recording.
Noise Cancellation
The condenser video recording microphone brings to the table a notable feature: noise cancellation. In the bustling world of ambient sounds and potential auditory disturbances, having a microphone that can sift through the noise to prioritize your voice is crucial. The ATR6250x employs a sophisticated noise cancellation technology that promises to minimize unwanted ambient sounds, providing a cleaner, clearer audio output.
Imagine recording a podcast in a room where the subtle hum of an air conditioner or the distant murmur of conversation could potentially disrupt your recording. The ATR6250x, with its noise cancellation feature, works diligently to minimize these disruptions, ensuring that your voice is captured prominently, even amidst potential auditory chaos. But how does it connect with various devices to deliver this crisp audio?
Connectivity Options

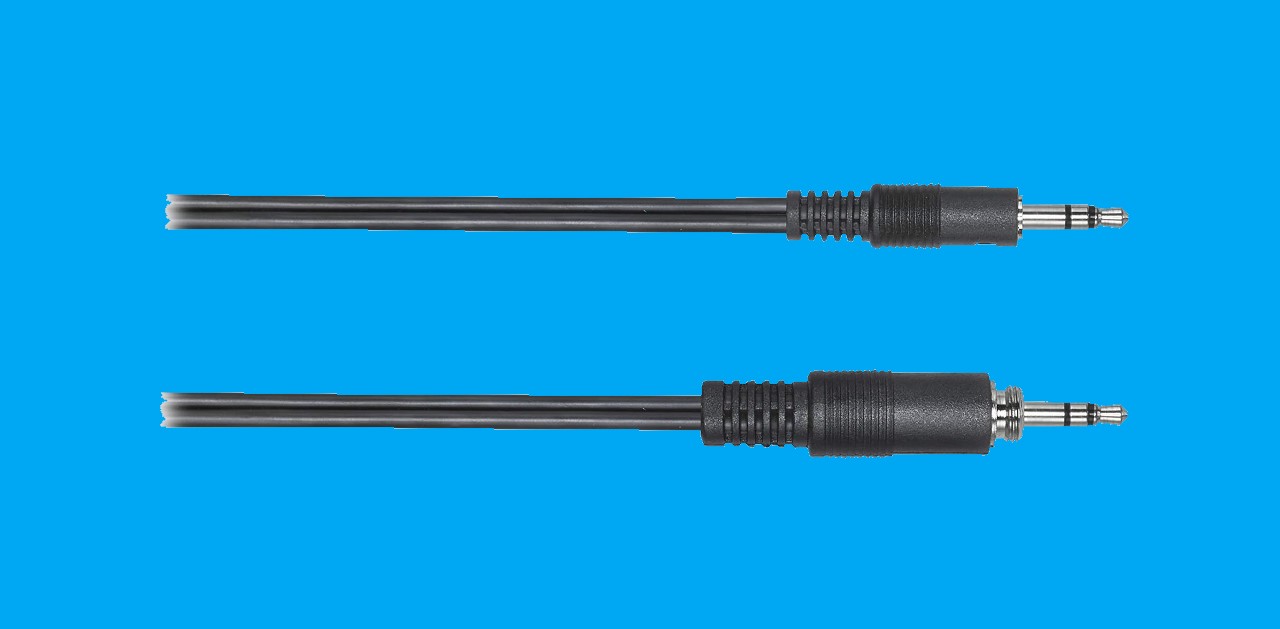
The ATR6250x plugs into your camera or audio recorder. Image Source.
In an era where versatility is key, the ATR6250x shines with its varied connectivity options. Whether you’re connecting to a DSLR camera, a recording device, or a computer, the microphone provides options that cater to different recording needs. It comes with an array of cables and adapters, ensuring that whether you’re in a studio or out in the field, connecting to your desired device is seamless and straightforward.
The inclusion of different cables and adapters not only provides flexibility in terms of compatibility with various devices but also ensures that you’re not scrambling for additional accessories post-purchase. This thoughtful inclusion speaks volumes about Audio-Technica’s commitment to providing a comprehensive package to its users. But how does the ATR6250x stack up against its predecessors?
Comparison With Previous Models
Comparing the ATR6250x with its predecessors, we observe a noticeable evolution in terms of both design and functionality. While maintaining the compact and user-friendly design synonymous with Audio-Technica microphones, the ATR6250x introduces enhanced features and improved audio quality that cater to the evolving needs of content creators and audio professionals alike.
The Audio Technica ATR6250x stereo not only maintains the strengths of its predecessors but also addresses areas of improvement, providing an upgraded user experience that is reflective of both user feedback and advancements in audio technology. This evolution is not just limited to maintaining and improving upon existing features but also introducing notable upgrades, which we will explore next.
Notable Upgrades
One of the standout upgrades of the ATR6250x is its enhanced sensitivity and improved noise-handling capabilities. These upgrades ensure that whether you’re recording in a controlled environment or a dynamic, unpredictable one, the microphone is adept at capturing clear, detailed audio while minimizing disruptions and distortions.
Moreover, the ATR6250x comes with a short camera cable and a stereo recording cable, ensuring that users have the necessary tools to connect to a variety of devices, from camera or audio recorder setups to more complex, professional rigs. The interchangeable mic stand base also provides flexibility in how the microphone can be mounted, catering to both stationary and mobile recording scenarios.
Concluding The Review
As we draw the curtains on this comprehensive review of the ATR6250x microphone, it’s pivotal to revisit the key takeaways and reflect on the microphone in its entirety. From the initial unboxing experience to its performance in varied practical scenarios, we’ve navigated through the multifaceted aspects of the ATR6250x, aiming to provide you with a well-rounded, detailed perspective.
The ATR6250x emerges as a microphone that not only promises but delivers high-quality, consistent audio recording across diverse environments and usage contexts. With its robust build, enhanced features, and user-friendly design, it caters to both professionals and beginners, albeit with a price point that may be a consideration for the latter.
In conclusion, the ATR6250x stands tall as a reliable, versatile, and high-quality microphone, ensuring that your investment is justified with consistent, impressive performance across the board. Whether it aligns with your specific needs, budget, and usage scenarios is a decision that now, with this detailed review in your arsenal, you are well-equipped to make.