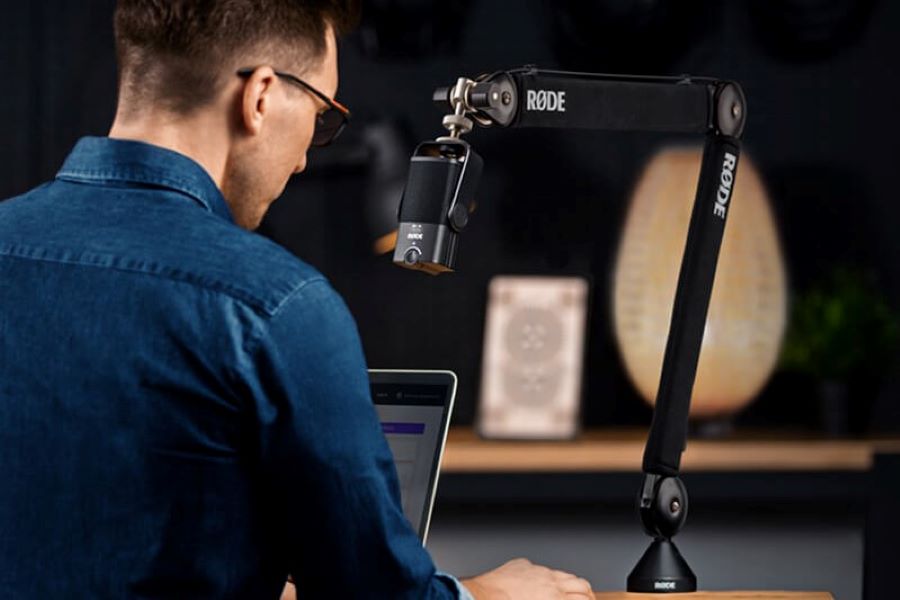
The Rode NT-USB microphone is a professional mic that delivers stunning and crystal clear sound. It is a perfect microphone for podcasting, live streaming, gaming, and music. However, its tripod stand sometimes does not facilitate a perfect microphone setup, and users lose the proximity effect when recording.
Fortunately, a microphone arm could be the missing piece to give you the best experience when using your Rode NT-USB. A mic arm helps maximize audio quality, manage recording space effectively and deliver an excellent mic technique.
This article will introduce you to the best mic arms for your Rode NT-USB, explain why investing in a microphone arm is a worthy move, and outline a step-by-step guide on connecting the two.
Related: 5 Best Microphone Arms for a Flawless Recording
Contents
Why Invest in a Mic Arm
There are several reasons why you should bring on board a microphone arm.
Excellent Mic Positioning
Unlike a standard tabletop stand, a mic arm facilitates perfect mic placement. It enables you to adjust the distance between you and the microphone, eliminating the need to lean forward to get to the mic. Having the mic close to your mouth ensures your voice goes directly to the trajectory, and the optimal part of the mic guarantees a fuller and high-quality voice.
Keeps Things Tidy and Organized
A microphone stand means reduced working space since you must place it on your desk for the best sound quality. It becomes a challenge if you have limited space as you are likely to knock it off, especially when reading a script or recording while moving your hands. A mic arm brings the much-needed relief as you can move it out of the way once done recording.
Flexibility
Mic arms offer flexibility since you can mount them in any position on your desk. You only need to clip and unclip from your desk to the new position. They are also ideal if you are always on the go since you can dismantle and pack easily.
Best Microphone Arms for Rode NT-USB

A man using PSA1+ professional studio arm. Image source.
When choosing a microphone arm for your Rode NT-USB, ensure it’s compatible and has all the features you need for your broadcast. Here are our top three options.
Rode PSA1 Boom Arm
Rode PSA1 Boom Arm is a studio boom arm with a perfect mic angle positioning feature. In addition, it allows for a professional and easy placement of the Rode NT-USB microphone due to its internal springs and parallelogram.
The parallelogram design ensures your mic remains in a stable direction even as you adjust the height. On the other hand, the internal springs guarantee a flexible and quiet microphone positioning.
Rode PSA1 Boom Arm features a maximum reach of 820 mm horizontally, giving it a 360-degree rotation and maximum flexibility and dual-axis swivel mounts for precise positioning.
Additionally, the boom arm supports microphones weighing between 700g to 1.11kg, making them perfect for your Rode NT-USB microphone. The boom arms also come with a thread adaptor of ⅜ to ⅝ inches, desk clamp, and desk insert.
Blue Compass Premium Mic Boom Arm
If you are looking for a sleek mic arm that will place your Rode NT-USB, the Blue Compass Premium Mic Boom Arm is your secret weapon. The mic arm has hidden springs designed to support and hold the microphone.
It also has hand-tightening friction hinges for a 360-degree rotation and smooth and quiet operation. It is also ideal for supporting heavy mics as it supports mics weighing up to 1.1 kg and has a ⅝ inches thread.
The boom arm also has a hidden channel perfect for cable management and a maximum reach of 813 mm for a spacious and comfortable working space.
Samson MBA38
Samson MBA38 Boom Arm comes with a c-clamp structure that enables two mounting options, a quick attachment to your desk and a permanently fixed flange alternative. In addition, its hidden spring system guarantees an easy and silent mechanical operation and reduces the risk of handling noises, especially during live recording.
The MBA38 boom arm has a horizontal and vertical reach of 38 inches, offering convenient flexibility in microphone placement. The boom arm also has ⅝ inches of threading, comfortably accommodating your Rode NT-USB.
Related: Boom Arm With Big Clamp: Top Brands to Choose From
How to Connect Your Microphone to a Mic Arm
Whether you are using an MBA38 boom arm or a Rode PSA1 Boom Arm, the following procedure is standard and quite similar for any brand.
- Unscrew the c-clamp and slide it over on your desk.
- Screw the underside part of the c-clamp until it hangs tightly to your desk. The clamp will be your foundation support.
- Insert the boom suspension arm into the c-clamp. Rotate it slowly until its secure.
- Attach the shock mount to the boom arm until it’s safe and secure.
- Connect your microphone to the shock mount.
- Adjust your boom suspension arm until the pivot point makes a 90-degree angle.
- Connect your microphone cable to the mic and stick the cable into the hidden channel and close it up.
Summary
If you enjoy using your Rode NT-USB microphone, having to incorporate a mic arm will make your experience sweeter and more fulfilling. A mic arm will help you organize your workspace, offer flexibility, and, most importantly, deliver an excellent mic positioning.
So, whichever mic arm brand you choose, ensure it is compatible with your Rode NT-USB and follow the manual instructions when connecting the two.