Connecting the Blue Yeti into a mixer is simple. You can do so easily by:
Step 1: Check on the computer to ensure the microphone is well set up.
Step 2: Ensure that the microphone and audio mixer are powered up.
Step 3: Connect the Aux cable into the microphone’s headphone jack.
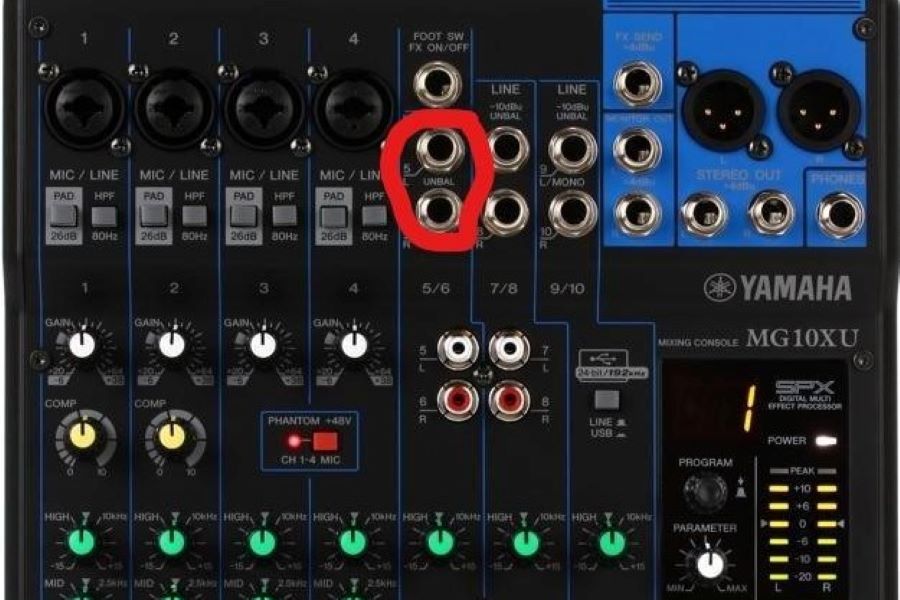
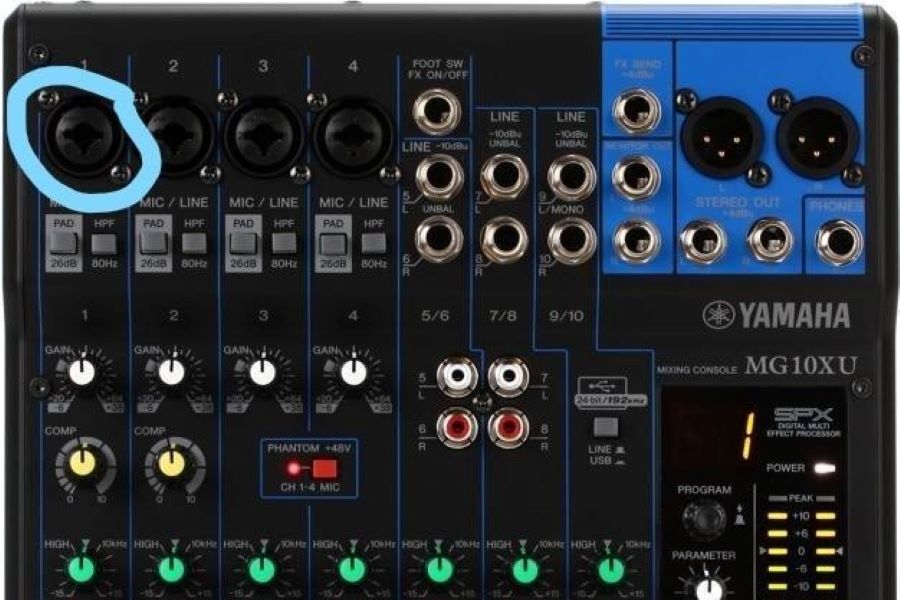
You can now connect the two end jacks(white and red) of the Aux cable in the audio mixer, in two options:
Option 1: Plug it in the stereo line level inputs on the audio mixer dubbed, level 5 and 6
Option 2: You can use the first quarter inch input of the combo jack dubbed “Mic/Line” to plug in one of the two end jacks preferably, the white jack.
How to Set Up the Blue Yeti for Better Sound
Most of the issues associated with the Blue Yeti, like background noise, reverb, and echo, are problems arising from its use. Here’s how you can set up the Blue Yeti for better sound.
Microphone Positioning
Ideally, it would help place the microphone close to your mouth, preferably 6 to 8 inches. You should talk to the side of the microphone and if you don’t have a pop filter, talk past the mic for the wind to pass by when you pronounce letters like “P.”
Related: How to Minimize Breathing Using Blue Yeti
Gain Control
The gain control helps with sensitivity; thereby, the microphone tends to pick up more background noise when you set it higher. Therefore, you should set the real gain low, at around 25%.
Additionally, you can tweak and test settings in the sound input settings of your PC to ensure it isn’t too high.
Related: How To Optimize Your Blue Yeti Mic Settings
Recording Environment
When having reverb and echo issues, you should integrate sound baffles like carpet and fabrics into your studio. This sound baffles ensure your place is dead silent and that the audio isn’t spoiled by echo.
Blue Yeti Accessories
You can purchase a shock mount to help absorb structure-borne noises such as movement and vibration. Additionally, you can purchase a pop filter to help sort out the issue with pronouncing “P”.
Monitoring
Use the headphone jack and the volume knob settings at all times in your recording. This helps you monitor the quality of the audio when recording, and ensures you notice a problem as soon as possible and make the necessary changes.
Understanding Polar Patterns
Many people don’t understand the use of the different recording modes of polar patterns. For example, the mic might be on stereo mode, and the intended purpose of the podcast is suitable for cardioid mode.
This section ripples the next solution: use one microphone per person to ensure quality audio. If you can’t afford such expenses, then make sure you understand the different recording modes and how you can use them.
Related: The Best Microphones For Recording in Podcasting (2023)
Conclusion

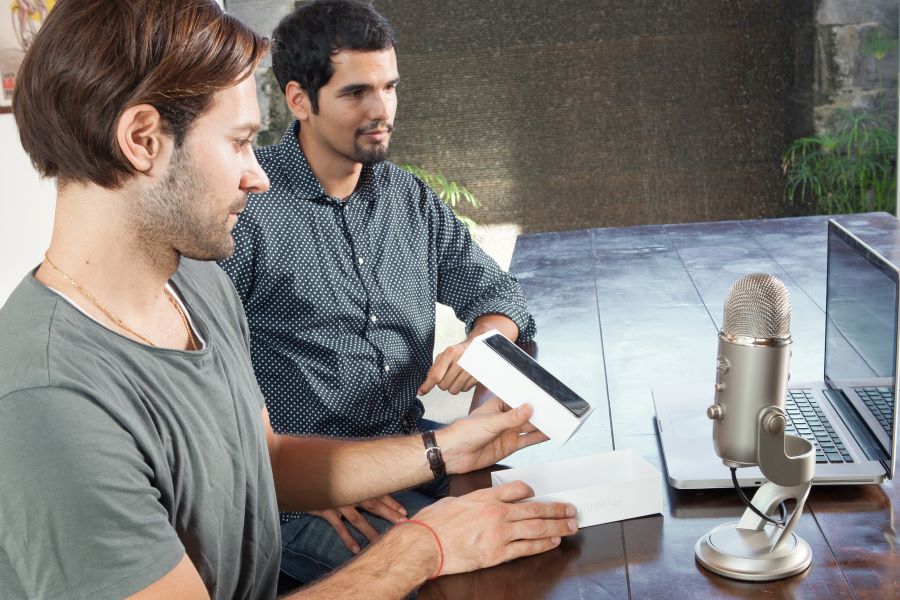
A Blue Yeti mic being used in a livestream. Image Source.
Connecting the Blue Yeti into a Mixer is an easy task, once the mixer is connected to the computer, either plug the microphone into the stereo line level inputs on the audio mixer or connect a quarter inch input of the combo jack into the mixer.
Related: Top 9 Best Podcast Mixers | The Ultimate Buying Guide

