The reason for the placement is still unknown, but some theories exist. Whatever the reason, it’s causing some problems for users who need to record audio or make calls in quiet environments. Apple has yet to explain the microphone placement, but hopefully, they will soon.
In the meantime, users are left with a phone with a microphone in an inconvenient spot.
Related: Best iPhone External Microphones For Podcasting
Contents
Where are iPhone XR’s Microphones Located?
The iPhone XR has three separate microphones in different parts of the device. These microphones are used for various tasks, from recording video to making phone calls.
The three microphones are located:
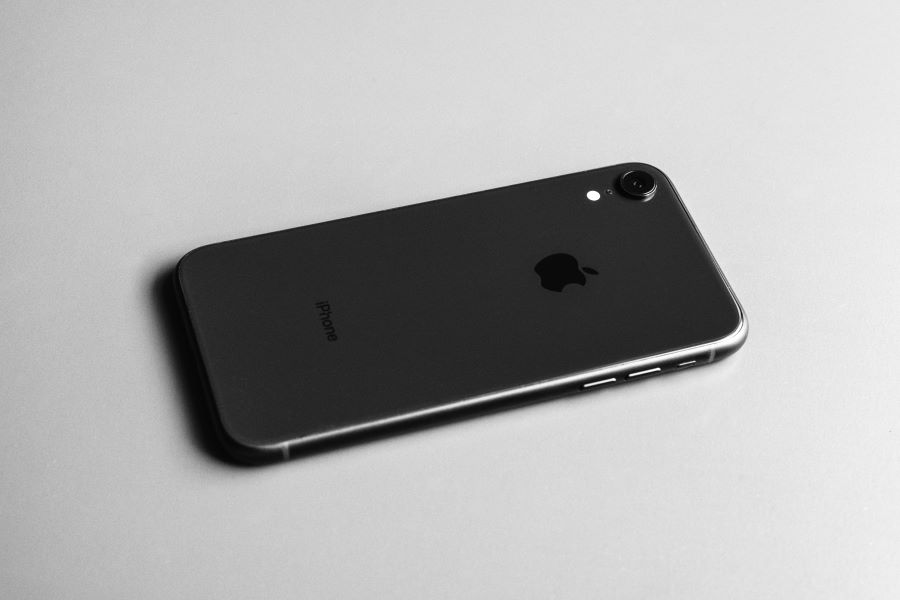
Microphone at the rear
This microphone is easily seen as it’s located on the iPhone XR’s back, next to the camera, just above the flash.
If you’re having issues with someone not being able to hear you while recording- this is the microphone you should be checking.
Microphone at the front
Located just above the display on your iPhone XR, you might miss it if you don’t know to look for it – this tiny microphone is tucked away behind a speaker grill.
Perfect for FaceTime calls and video recording with the front-facing camera with true tone flash, as well as using Siri hands-free, this mic offers convenience and clarity all in one!
Microphone at the bottom
You’ll find the microphone below this device near its lightning connector, an area that often confuses people as they mistakenly believe it’s a speaker. Many don’t even realize there is a microphone in this spot!
Related: Best Microphones For Recording in Podcasting
Why Did Apple Put These Microphones in Those Locations?
The mystery of why Apple put the microphones in these three locations remains unsolved.
Some experts suggest that it was done to improve sound quality, while others think it’s an attempt to make the phone more waterproof by having fewer holes in the device. Whatever the reason, it’s clear that Apple wanted something different when they designed the iPhone XR.
What are their uses?
- The rear microphone is used for recording videos on the rear camera and for noise cancellation when making phone calls.
- The front-facing microphone is used for FaceTime call, recording video with the front-facing camera, and Siri.
- The bottom microphone is mainly used for phone calls (not speakerphone) and allows clear conversations without needing external noise cancellation.
What are the iPhone XR Microphone Issues?
Some of the common issues iPhone XR users are facing with the microphone placement on the iPhone XR include the following:
- Poor sound quality when using rear microphone recording
- Low audio levels when using a front-facing microphone
- Difficulties with noise cancellation on phone calls
- Issues hearing people clearly from the bottom microphone during phone calls
- Unclear audio recordings from all microphones due to lack of wind protection
- Problems with inconsistent and unpredictable results when attempting to record video or audio in noisy environments
Related: Where Is The Microphone On A Mac?
How to Improve the iPhone XR Audio Quality?
Thankfully, there are a some few ways to fix iPhone XR microphone issues and get the best audio quality from your iPhone XR.
Check microphone volume
Ensure the microphone volume is set to the highest level before attempting any audio recordings. This will ensure you get the best sound quality from all three microphones.
Use an external microphone
An external microphone will help pick up sound more accurately and reduce background noise. This is particularly helpful when recording in noisy environments.
Invest in a wind muff or foam
A wind muff or foam will help reduce wind noise and interference when recording outdoors.
Test each microphone separately
You don’t know which microphone will be best for your recordings until you test them out one by one, so make sure to do a few tests before committing to a microphone.
Tap microphone
Sometimes all it takes is a slight tap on the microphone to get the sound quality back. Give your microphone a gentle tap if you’re not getting clear audio when recording.
Minimize background noise
Background noise can be incredibly distracting, and it’s essential to do whatever you can to reduce it when recording audio or video.
Turn off phone noise cancellation
Phone noise cancellation is excellent for reducing background noise but can sometimes interfere with the sound quality of your recording. Turning it off while not using the phone will ensure you get the best audio quality possible.
Be sure to clean the microphones
Dirt and grime can accumulate on our microphones over time, so cleaning them regularly with a brush or cloth is essential.
Adjust your iPhone Settings
Finally, adjust the audio settings on your iPhone XR to optimize for the best sound quality.
Contact Apple Support
If you’re still having issues, contact Apple Support for help. They can locate microphone, offer advice, and provide further tips to improve your audio quality.
By following these tips, you can make sure that your iPhone XR audio recordings and calls are top-notch!
Related: Where Is The Microphone On AirPods?
Bottom Line
The iPhone XR has three microphones located in different spots on the phone. Each microphone serves a different purpose and can be used to improve sound quality when recording audio or making calls.
However, users should be aware of some issues that may arise due to the placement of these microphones. By using an external iPhone microphone, investing in a wind muff or foam, minimizing background noise, and adjusting your phone settings, you can ensure that you get the best audio quality from your iPhone XR compared to the iPhone XS max.
