Audacity is a powerful, open-source audio editor that makes it easy to edit and mix your podcasts. However, sometimes your recorded podcasts can have unwanted sounds like reverb or echo in Audacity. Fortunately, Audacity can help you remove these sounds with just a few clicks!
In this article, we’ll show you how to use Audacity to remove reverb from your podcast for crystal-clear audio. We’ll go over the basics of reverb and explore some tips and tricks for removing it quickly and easily. So if you want to make sure your recordings sound their best, keep reading!
Related: How To Edit A Podcast In Audacity
Contents
What Is Reverb?
Reverb is one of the most common types of signal processing used in podcast and music production. It’s an effect that adds reverberation or echoes to a sound, giving it a “larger than life” audio quality. This is achieved by adding multiple copies of the original signal with slightly different delays and amplitudes; this creates a unique effect that can help bring life to a track.
It’s also colloquially used when meaning to say “echo”.
Too much reverb or echo can muddy up a mix and completely ruin the sound of your production. This is why it’s important to know how to remove reverb in Audacity.
Removing Reverb In Audacity
Now that you know what reverb is, it’s time to learn how to remove it in Audacity. There are several steps to this process, so we’ll break it down into easy-to-follow steps.
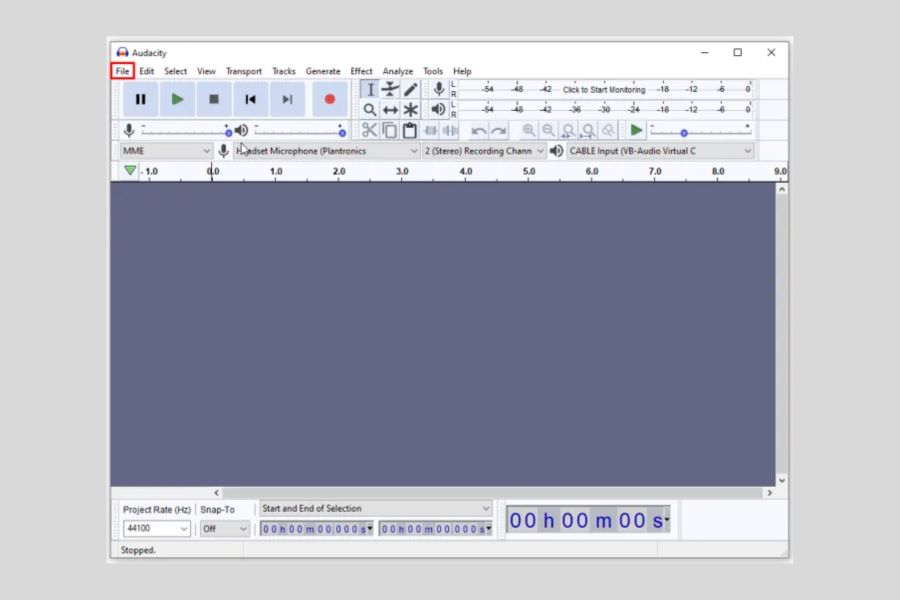
Step One: Launch Audacity
The first step to removing excess reverb from your audio recording is to launch Audacity, a free and open-source software used for an edited audio file. Once you’ve downloaded and installed the program onto your computer, open it up and proceed to the next step.
Step Two: Import An Audio File
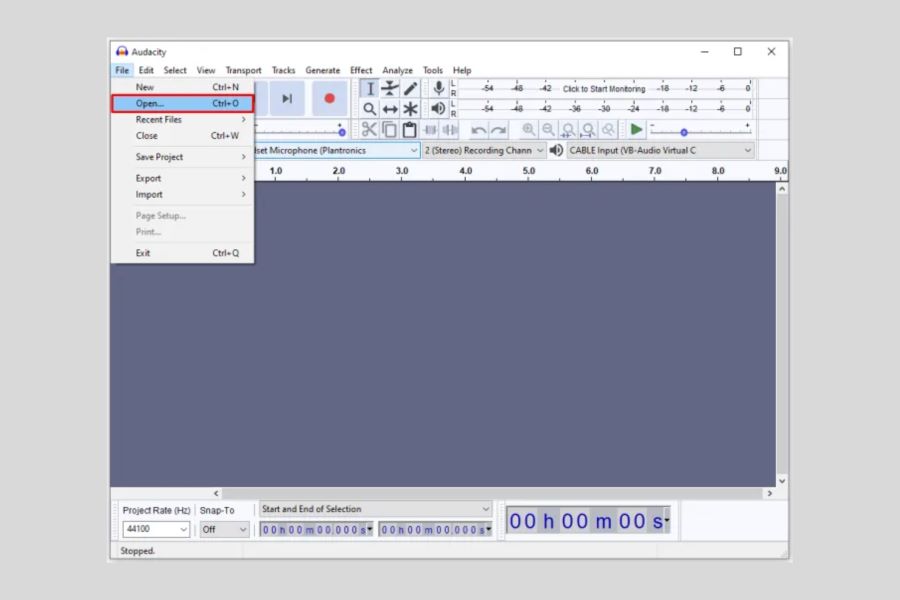
Once you have Audacity open, you can import an audio file into the program. To do this, click File > Import > Audio in the top navigation bar and select your audio file from its saved location. The sound waves of your recording will then appear on the Audacity timeline. If you have M4A files to import, then we also a guide for you.
Step Three: Noise Reduction Filter
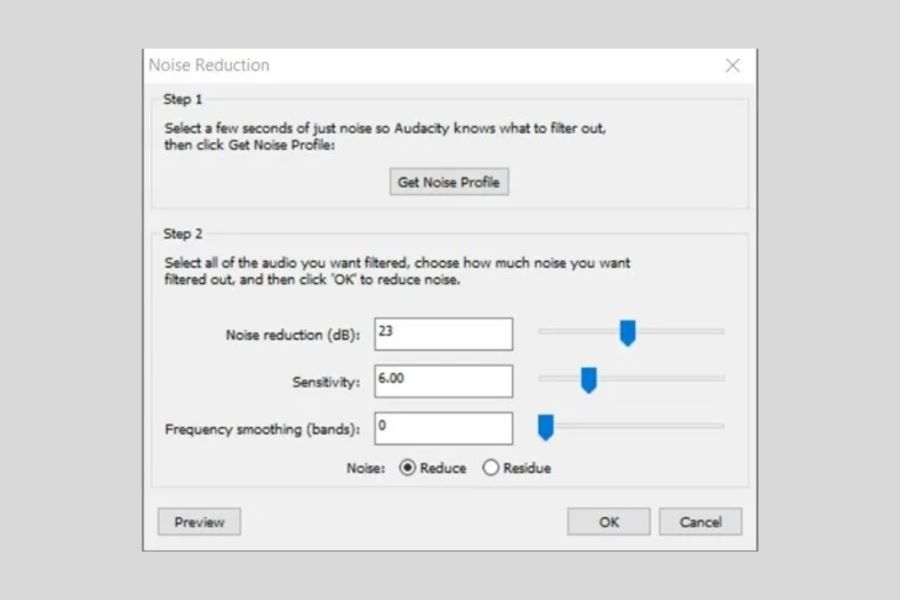
Now it’s time to apply the noise reduction filter. This filter will help reduce the reverb and other noise in your recording. To do this, select all of your audio (Ctrl+A), go to Effects > Noise Reduction, and then click “Get Noise Profile”. If you’re on Mac, it’ll be Command+A, then Effects > Noise Reduction.
The noise reduction filter will then analyze the audio and use that to make a profile of the noise in your recording. Once you’ve got the profile, click “OK” and then adjust the noise reduction slider for “Noise Reduction”, “Sensitivity”, and “Frequency Smoothing”. You can experiment with different settings to find the best sound for your recording. Once you’re happy with your settings, click “OK” to apply the unwanted noise reduction filter.
Related: How to Remove Background Noise & Static in Audacity
Step Four: Increase The Amplification Of Your Audio
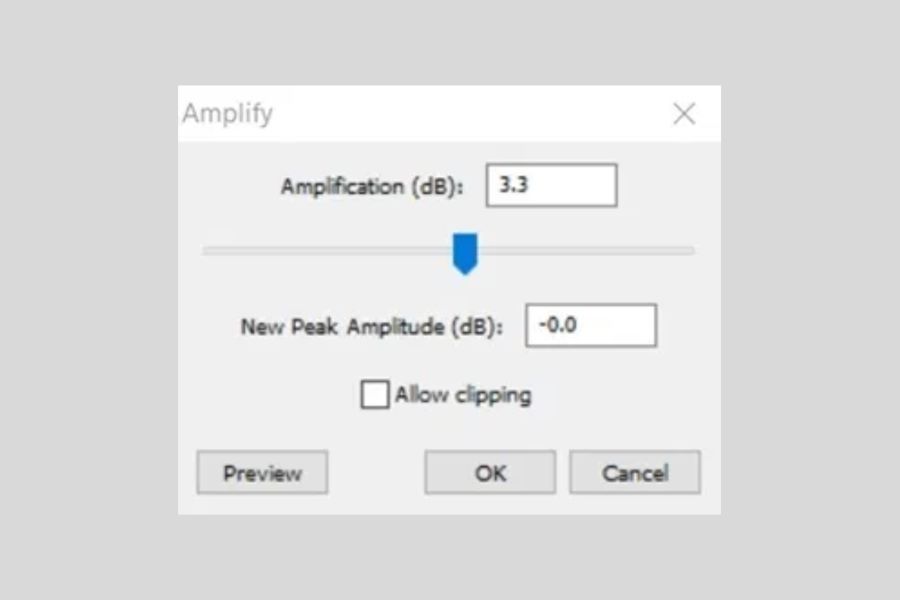
Next, you’ll want to increase the amplification of your audio. This will help bring out the sounds that have been dampened by the noise reduction filter. To do this, select all of your audio (Ctrl+A on Windows or Command+A for Mac), go to Effects > Amplify, and then adjust the “Amplification (dB)” slider to the desired level. Once you’re happy with your settings, click “OK” to apply the amplification filter, and you should be good to go with a much cleaner-sounding audio recording.
Step Five: Introduce A High-Pass Or Low-Pass Filter
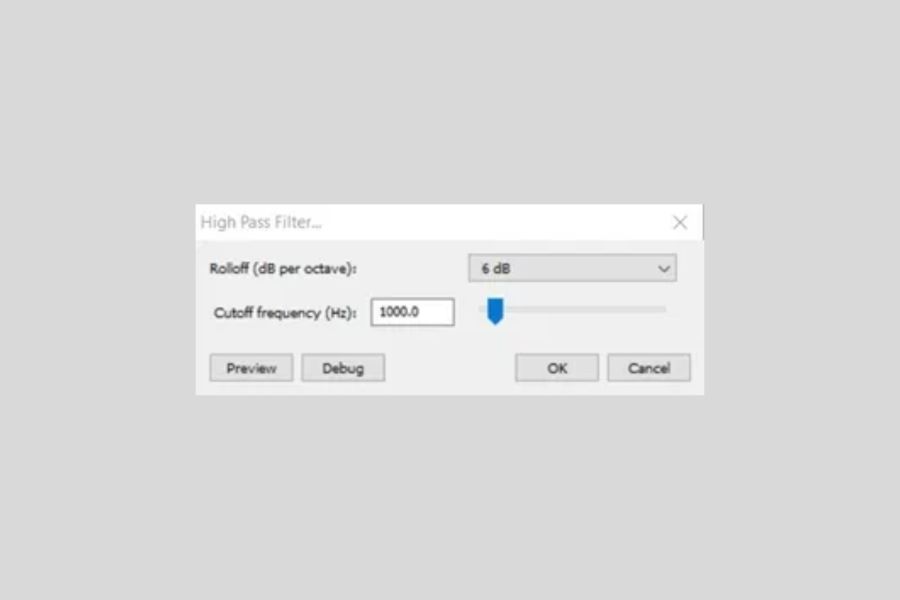
If you feel like your audio still has too much reverb in it, then you can introduce a high-pass or low-pass filter. This filter will help reduce any excess frequencies that are causing the reverb in your recording. To do this, you’ll need to click on Effects > High-Pass Filter or Low-Pass Filter. You can play around with the frequency until you find a setting that works best for your audio. As always, be sure to listen back after each adjustment to make sure it sounds good and that there is no unwanted distortion in the recording.
Step Six: Export Your Audio
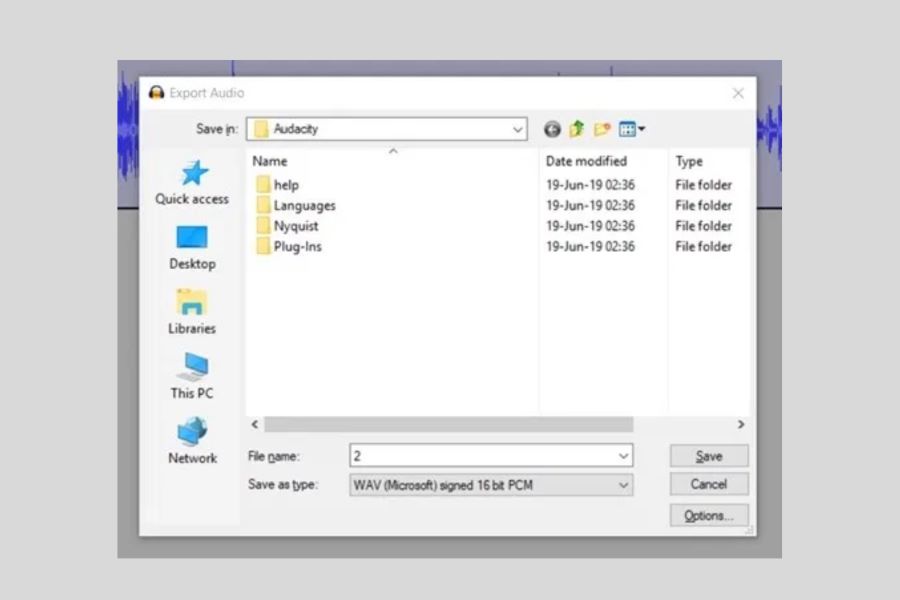
Once you’re happy with the sound of your recording, it’s time to export it. To do this, click File > Export in the top navigation bar and enter a name for your file. You can also select which format you want to save it in (MP3, WAV, etc.) and then click “Export”. “Ctrl+Shift+E” is a shortcut to export the audio. If you have more questions about how to export files from Audacity, we also have a guide for you.
Congratulations! You have now successfully removed the reverb from your audio recording with Audacity.
As you can see, removing reverb from audio files and recording is a straightforward process that anyone can do with just a few clicks of their mouse. Just remember to experiment with different settings and listen back to make sure you’re happy with the result before exporting. With a bit of practice, you’ll soon be able to produce clear and crisp recordings free of unwanted reverberations.
Why Is It Important To Remove Reverb?
Now that you know how to remove reverb from your recordings, it’s important to understand why this is such an important step. Reverb can be a major distraction when listening to audio and can even make the sound hard to understand. There are several reasons why removing reverb is important:
Reverb Can Make The Audio Sound Muddy Or Cluttered
The sound of reverb in the background can make a recording sound unfocused and muddy. This can make the audio hard to listen to and is generally considered poor quality.
Reverb Can Mask Important Details
Reverb can also act like a blanket, muffling out certain audio frequencies or elements you want to highlight in your recordings. This can make it hard to pick out certain details in the audio.
Reverb Can Be Distracting
Reverb can be distracting for listeners as it takes away from the clarity of the sound and makes focusing on what is being said or played more difficult. The sound reflections that come with reverb can make the audio sound chaotic and cluttered.
Reverb Can Make A Recording Sound Artificial
Too much reverb can make the audio sound overly ‘processed’ or artificial. This can take away from the authenticity of the recording and be off-putting for listeners. The gate threshold is the level at which a signal will be reduced so it will not be heard. If the gate threshold is set too low, then there can be a risk of losing important audio information due to reverberation.
Reverb Can Decrease The Quality Of The Audio
With too much reverb, recordings can end up sounding distorted or have a harsh, unpleasant tone. This will reduce the overall sound quality and make it far less enjoyable to listen to.
These are just a few of the reasons why removing reverb from your recordings is so important. Taking the time to do this will help make your audio sound much better and increase its clarity, allowing you to get the most out of your recordings.
Related: How to Get Rid of Echo in Audacity
FAQs
Can you remove reverb from a recording?
Removing reverb from a recording can be a challenging task, but it is possible with some of the technology that is available today. Through specialized acoustic treatments and software such as digital audio workstations (DAWs), sound engineers are able to make use of a variety of tools to reduce or even eliminate the presence of reverb.
This is done by using many different methods, such as by using Reverb Removal algorithms or by manually cutting out sections in multiple passes. A noise gate plug-in and high-pass filter/low-pass filters are two of the most commonly used methods to remove reverb. Regardless of the method used, when done right, the end result can greatly improve the sound taken away from the original recording.
How do I remove effects in Audacity?
If you’ve ever wanted to know how to remove or adjust an effect in Audacity, have no fear – it’s easier than you’d think! All you need is a few simple steps, and you’ll have total control of your audio. First, open up the track in Audacity that you want to edit audio files. Then use the Effect menu, which lists all the effects you can tweak and adjust.
From there, just click on the effect that needs fixing and change the settings as desired. Once done, hit ‘OK’ to save your adjustments and hear the result! With a few easy changes, you can do wonders for your audio project with Audacity!
How can Audacity help with reverb?
Audacity is a powerful and versatile audio editing software that can be used to reduce or remove reverb from recordings. It has several features specifically designed for this purpose, such as the Noise Reduction tool and the Equalization feature. By using both of these tools together, you can effectively remove any unwanted background noise or reverberation from a recording. Select noise reduction settings to reduce or eliminate reverberation on the noise floor, and then use equalization to fine-tune the sound.
This will help to make the audio sound much clearer and crisper while also helping it to stand out more against other competing noises in the background. Audacity is an invaluable tool for anyone looking to get rid of reverb quickly and easily.
Related: How to Use Audacity Equalizer
Conclusion
Now that you’ve learned the basics of how to remove reverb in Audacity, you should be well-equipped to clean up your audio recordings. It’s important to remember that removing reverb is a tricky process and requires some patience, practice, and experimentation.
However, with a bit of work, you can drastically improve the sound quality of your audio recordings in no time. So why not give it a try today? Who knows, you just might end up pleasantly surprised with the results! And if you’re looking to reduce reverb in GarageBand, we’ve also got you covered.
