Many people use a Zoom microphone for podcasting and voiceover work because of the combination of features and affordability. You can connect the H series to your computer as a USB audio device or use the portability features to record almost anywhere.
The Zoom audio recorders might not offer professional recording sound quality in the studio, but its versatility ensures almost anyone can start a podcast without worrying about their budget.
When you’re ready to take your podcasts to the next level, the first upgrade to consider is the microphone. One of the best choices to review is the RØDE Procaster.
Why Choose the RØDE Procaster for Podcasting?
Many dynamic microphones attempt to market themselves as suitable for anything. RØDE tells you right away that this mic is meant for speech.
The Procaster uses a cardioid pickup pattern, creating the ideal recording environment for individual speech. It uses an XLR connection, which is different from the Podcaster’s USB-only option, allowing it to fit your workflow perfectly.
When you have the Procaster, you have a microphone designed for more of a broadcast audience. It requires more work to complete the setup, but delivers essential results for those with the technical knowledge to go in that direction.
Its cardioid pickup pattern delivers 180 degrees of rejection. That makes it better suited for directional use in front of a single person’s voice. You talk directly to the top of the microphone instead of to its side, even though it looks like you’d do the opposite. An internal pop shield is available, although an external one is helpful to use.
It features a frequency response of 75 Hz to 18 kHz, so the lower end isn’t exceptional. You will find a sweet spot in the midrange that delivers smooth, consistent speech. The balanced low impedance output works with the high output dynamic capsule to deliver broadcast-quality results from virtually any location.
You’re Forced to Use an Audio Interface or Mixer
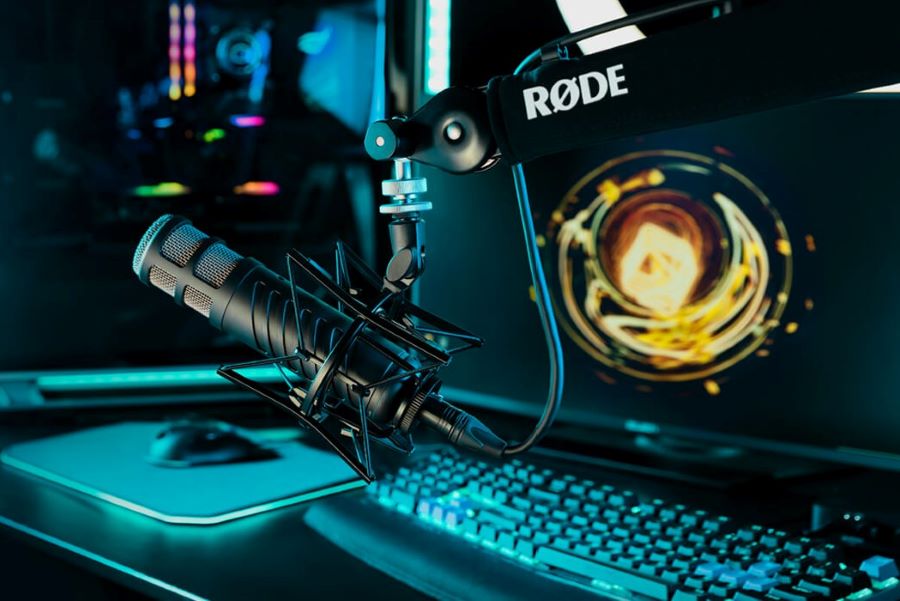
Rode Procaster in a gaming setup. Image Source.
If you prefer a plug-and-play option, the RØDE Podcaster is a better microphone to use. The equipment profile is the same except for how you’re connecting to your preferred recording medium.
Since the RØDE Procaster uses an XLR input, it forces you to use an audio interface or mixer instead of a USB connection. Although it takes more work, you have more control over the eventual sound. It needs a bit of gain, so you’ll need something that delivers a reasonable boost from your preamps.
This issue can push the RØDE Procaster into some unwanted noise, although the high pass filter typically negates it. The settings where you record have the most impact on the sound, but you’ll achieve excellent results without spending lots of extra time in post-production.
Here’s a closer look at the Procaster’s specs.
| Microphone Type: | Dynamic |
| Polar Pattern: | Cardioid |
| Frequency Response: | 75 Hz to 18 kHz |
| Output Impedance: | 320 Ohms |
| Color: | Black |
| Connection: | XLR |
| Weight: | 1.53 Pounds |
What Is the Best Setup to Use with the RØDE Procaster?
The RØDE Procaster works best when you have a shock mount and a boom arm available to use. Investing in the RØDE PSA 1 and PSM 1 can get you initially better results.
What you’ll notice with the RØDE Procaster is that a dynamic microphone doesn’t always sound great when working with a USB audio interface. When you send a signal to a computer, you want it to be as clean as possible.
The Cloud Microphones Cloudlifter CL1 is a preamp and microphone activator that delivers a massive boost without causing distortion. The only potential disadvantage for some podcasters is its phantom power requirement.
Although you could technically use adapters to feed the signal directly to a computer, it helps to have a USB audio interface available. This investment delivers the phantom power the Cloudlifter (or a similar preamp/activator combo) needs while giving you an option for headphone monitoring.
The final requirement involves the cables for your setup. These need to preserve and deliver a clean signal for your recording requirements. Although LyxPro XLR balanced mic cables cost a little more, you’ll notice a massive difference in the end quality of your work.
When you start recording with the RØDE Procaster, you’ll find that your podcasts benefit from the pleasing speech this mic delivers. Although it requires more equipment and technical knowledge than other choices, you’ll still receive an outstanding value for your investment.
Related: Rode Procaster vs. Audio Technica 2020 and Rode Procaster vs Shure SM7B